Imagine being able to print a full-color, professional-grade photograph and flawlessly applying it to a heavy cotton hoodie, a nylon gym bag, or even a vintage leather jacket right from a spare bedroom. For years, custom apparel required either expensive industrial machinery or settling for cheap iron-on paper that cracked after a single wash. Today, a specialized machine known as a dtf printer bridges that gap, transforming standard home offices into mini-production studios. This technology takes the basic inkjet mechanics you likely already understand and upgrades them for professional-level fabric customization. The Amazing fact about direct to film printer.
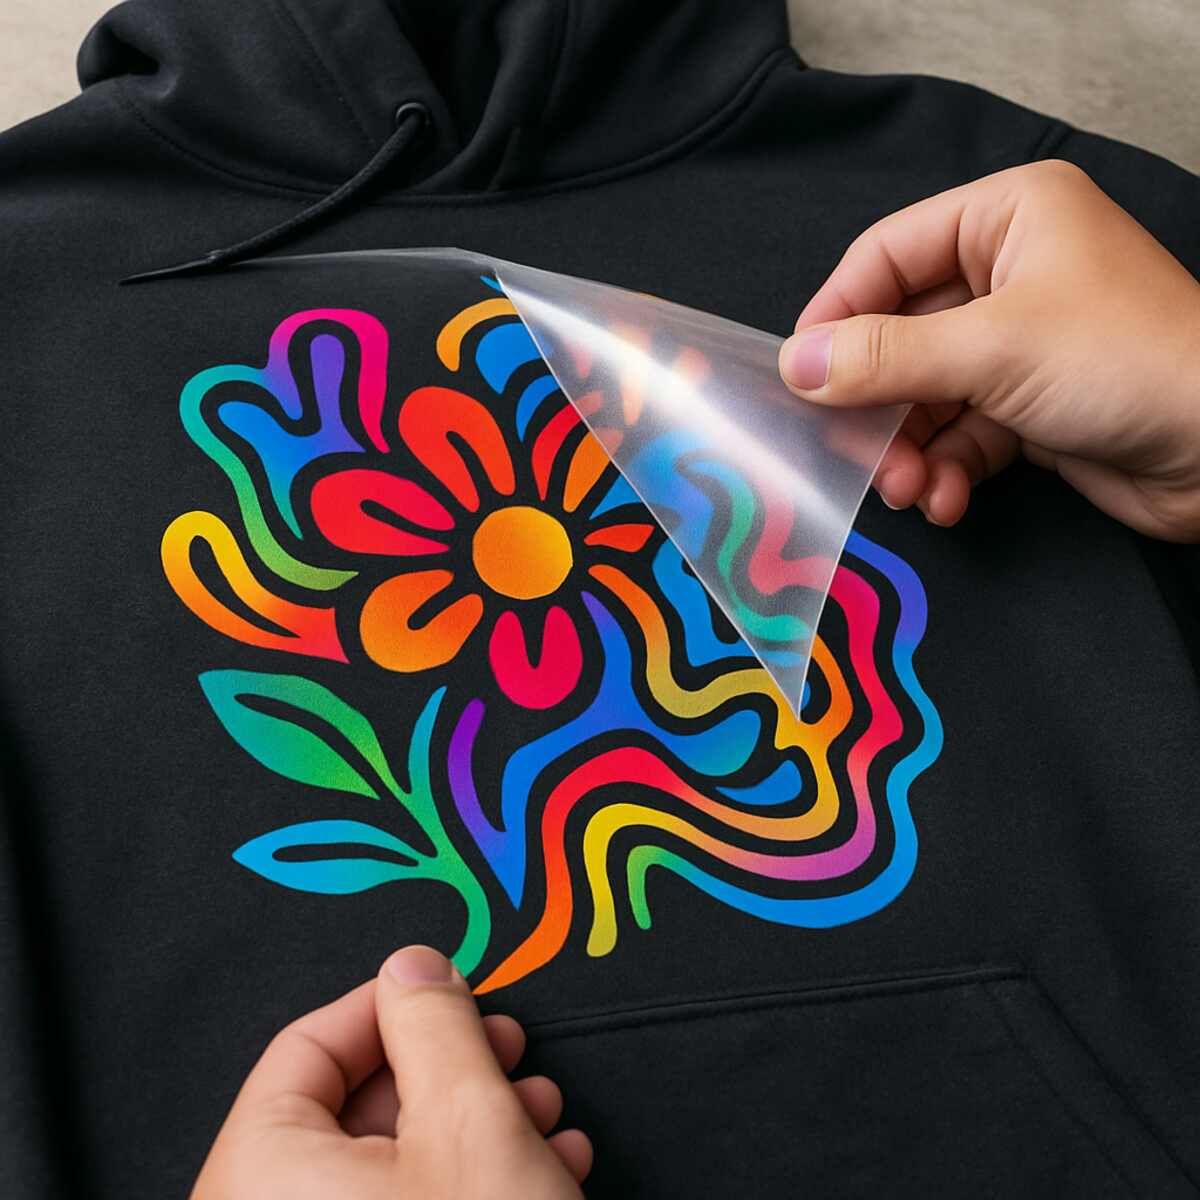
Think of this innovation as a high-tech temporary tattoo for textiles. Instead of trying to force standard liquid ink straight into woven fibers, the direct to film printing process relies on a brilliant intermediary step. Your machine prints the digital design in reverse onto a special clear surface, ensuring the liquid does not simply bleed into the fabric and lose its shape.
Those clear surfaces are formally called pet film transfer sheets, and they are the secret behind the system’s incredible versatility. Because the ink rests on a smooth, non-porous film rather than soaking immediately into a porous shirt, the resulting colors remain incredibly vibrant and crisp. Your machine strategically lays down the colored ink first, followed by a thick layer of white ink that acts as a solid, opaque foundation for the entire design.
Creating these durable garments feels a bit like baking a multi-layered cake, requiring four main components to work together perfectly: the printer, the film, an adhesive powder, and a heat press. Once the ink is wet on the film, you apply a specialized powder over the design, which acts as a crucial layer of ‘glue’. After melting that powder in a small curing oven, a standard heat press binds the entire graphic permanently to your chosen garment.
We have all owned a favorite custom t-shirt that ultimately fell victim to peeling edges and spiderweb cracks. In practice, clothes created with these film transfers easily survive what professionals call “The Wash Test,” remaining stretchy, bright, and intact long after fifty laundry cycles. According to apparel industry standards, this remarkable durability happens because the melted adhesive powder essentially welds the flexible ink directly into the fabric’s natural fibers.
Stepping up from basic home crafting to professional-grade apparel production might seem intimidating at first glance. However, mastering this straightforward four-step process opens up an entirely new world of creative possibilities beyond basic white t-shirts. Whether you are outfitting a local youth soccer team or launching a boutique streetwear brand from your garage, understanding these core components is the vital first step toward bringing your boldest ideas to life.
Why the ‘White Ink Layer’ Is a Game-Changer for Dark Polyester Fabrics
Have you ever tried printing a picture on dark paper with a standard home printer? The colors completely disappear because everyday ink is naturally transparent. When printing on dark polyester fabrics or classic black cotton tees, you run into the exact same frustrating problem. The dark background simply swallows your vibrant design.
DTF technology solves this using a brilliant workaround: the white ink underbase. Think of it like painting a dark room; you wouldn’t brush bright yellow paint directly over navy blue walls without laying down a thick white primer first. The machine prints your colorful design onto the clear film, then immediately covers that exact shape with dense, opaque white ink. This bright foundation acts as a solid shield, blocking the dark fabric from showing through your artwork.
Because this barrier creates its own background, a dtf transfer delivers professional, high-contrast results on absolutely any color surface. Older techniques often fail on synthetic materials, but this method succeeds because the opaque layer sits cleanly on top of the fabric. Since this heavy ink is thick like liquid chalk, reliable machines feature a white ink circulation system to keep the liquid constantly moving and prevent clogs.
With that white shield protecting your colors, your custom gear will look incredibly vibrant. But having the perfect design sitting on a piece of film is only half the process. To actually get that artwork onto your favorite garment so it survives the laundry, we need the “magic glue”: how hot melt adhesive powder creates permanent bonds.
The ‘Magic Glue’: How Hot Melt Adhesive Powder Creates Permanent Bonds
Even after your dtf printer has laid down those brilliant colors and the white ink shield, the artwork sits wet on the clear film. To transform this wet ink into a flexible, wearable design that moves smoothly with stretchy fabrics like gym wear, you need a special bonding agent. This is where the hot melt adhesive powder steps in, acting as the essential glue between your printed artwork and the final garment.
Mastering the simple “shake and bake” technique ensures your design gets perfect, even coverage. The hot melt adhesive powder application follows three basic steps:
- Dusting the wet ink: You coat the freshly printed design with the fine, sugar-like powder.
- Shaking off the excess: Gently tap the film so the powder only sticks to the wet ink, leaving the surrounding areas perfectly clean.
- Curing in the oven: Heat the powdered film until the adhesive melts into a distinct, glossy skin.
Consistency during this coating stage directly determines the ultimate wash fastness and durability of your custom clothing. If you miss a corner while dusting, that specific piece of the image will simply flake off in the laundry because it lacks glue. However, a properly powdered design survives dozens of heavy wash cycles without peeling, as the melted adhesive creates a permanent, stretchy anchor directly into the shirt’s fibers.
Transforming that powdery dust into a durable, melted skin requires exactly the right amount of heat to activate properly. Too cold, and the glue remains chalky; too hot, and your vibrant colors might scorch. This delicate balance means you need precision temperature control to find the “sweet spot” in your curing oven.
Precision Temperature Control: Finding the ‘Sweet Spot’ in Your Curing Oven
Baking a cake requires a specific oven temperature to rise properly, and finishing your custom shirt design works the exact same way. Once your powder is applied, you need to melt it into a solid adhesive skin using precise curing oven temperature settings. If you simply guess the heat, you risk ruining the vibrant artwork you just created.
Recognizing a perfectly melted design comes down to a simple visual check rather than complex science. As the heat activates the powder, it transforms from a dull, sugary dust into a glossy, slightly textured surface that resembles an orange peel. Achieving this professional look requires controlling your “dwell time”—the exact amount of minutes the film sits inside the oven—usually hovering around two to three minutes.
Leaving the design under the heat for too long leads to a common beginner mistake known as scorching. When this happens, the clear pet film transfer sheets can warp or burn, making the melted glue brittle and causing the final t-shirt design to crack during its very first wash. Even the weather inside your workspace matters, as high humidity makes the powder clumpy, meaning you might need slightly longer dwell times to properly dry out and melt the adhesive.
Getting this baking process right guarantees that the vibrant output from your dtf printer survives dozens of heavy trips through the laundry.

DTF vs. DTG: Which Custom Apparel Method Wins Your Budget?
Choosing commercial apparel equipment feels like buying a car; you want the best mileage for your money. Since you know Direct-to-Garment (DTG) works like a giant inkjet for cotton shirts, a dtf vs dtg comparison clarifies where your budget belongs. While DTG excels at soft prints on pure cotton, DTF is the ultimate all-rounder.
The biggest hidden expense in traditional printing isn’t ink—it’s the invisible liquid foundation required beforehand. DTG requires “pretreatment,” a messy chemical spray preventing wet ink from soaking through the shirt. Direct-to-film skips this tedious step. Because the adhesive powder grips the material, the best fabrics for film transfers include stretchy polyester athletic wear, tough denim, and nylon.
Running the numbers reveals why independent creators are shifting focus. When doing a cost per garment calculation, weigh four major categories before making a purchase:
- Initial Investment: Film setups cost thousands less than commercial garment printers.
- Material Cost Per Shirt: Film, ink, and powder average just fifty cents per design.
- Fabric Compatibility: Printing on affordable polyester saves money compared to requiring expensive pure cotton.
- Maintenance Level: Both require daily upkeep, but film systems entirely bypass clogged pretreatment nozzles.
Saving time on chemical sprays means dedicating more energy to creating high-quality products from digital files.
Mastering RIP Software: The Translator Between Your Art and Your Printer
Sending a beautiful design from your computer isn’t enough; your machine needs a translator to understand the assignment. This is where Raster Image Processing, or RIP software, acts as the absolute brain of your operation. Without it, your dtf printer wouldn’t know how to handle the heavy, opaque white ink required to make your artwork pop brightly on dark fabrics.
Getting vibrant, brand-accurate hues from your screen onto a physical shirt requires a very specific recipe. Using rip software for color management unlocks “ICC profiles,” which function exactly like digital color dictionaries. If a client needs a local soccer jersey to be the exact perfect shade of crimson, these built-in profiles guarantee the ink mixes correctly every single time.
You also need precision to keep that thick foundation layer from ruining your artwork’s crisp edges. A clever software trick called “choking” slightly shrinks the white base beneath your image so it never peeks past the colored borders, much like hiding an undershirt. This process perfectly syncs with your machine’s dual print head configuration to print your colors and your white base simultaneously.
Mastering these digital controls allows you to confidently produce retail-ready garments right from a spare bedroom, provided your hardware stays in pristine working condition.
The Pet Rule: Why Daily Maintenance Saves Your Print Head from Clogging
Owning professional apparel equipment requires a mindset shift called “The Pet Rule.” Unlike a home office paper printer, your new machine needs daily attention to survive. Because liquid colors easily dry up when exposed to air, learning how to prevent print head clogging is your most critical daily habit. If neglected, the microscopic nozzles spraying your designs will quickly seal shut and stop production entirely.
The main culprit behind these frustrating blockages is actually the white base layer. Think of this specialized liquid like oil-and-vinegar salad dressing; if it sits still for too long, the heavy ingredients naturally sink to the bottom. This natural sedimentation causes solid white particles to settle inside the tubes. When that thick sludge hardens, it acts exactly like cement inside your delicate hardware.
To combat this settling effect, manufacturers built a clever internal solution. A white ink circulation system acts as a constant heartbeat for your dtf printer, automatically stirring and pumping fluid through the lines even when idle. This continuous movement keeps the heavy particles perfectly mixed. However, you must still power the machine on and perform quick daily test prints to verify the system is actively doing its job.
Spending five minutes every morning on these simple checks saves thousands of dollars in replacement parts over the life of your business. Protecting those expensive print heads ensures your equipment stays healthy and highly profitable, allowing you to confidently move beyond basic cotton t-shirts.
Customizing the Unconventional: Printing on Leather, Denim, and Canvas
Once your dtf printer is humming along smoothly, the real fun begins. While most beginners stick to basic cotton t-shirts, the true profit lies in customizing unconventional, high-margin items. Offering a personalized denim jacket, a branded leather notebook, or a heavy-duty canvas tote bag allows you to command premium prices and instantly stand out from standard custom apparel shops.
Unlike older craft methods that easily scratch off stiff materials, this modern process bonds uniquely. Because a dtf transfer utilizes a specialized melted adhesive powder, it acts like a high-tech, flexible glue. This chemical bond physically anchors the design into rigid canvas fibers or textured leather surfaces. The result is a vibrant, stretchable graphic that easily survives the daily scuffs, folding, and heavy wear these tougher accessories endure.
Transitioning from a thin t-shirt to a thick jacket does require a quick physical adjustment to your equipment. Because dense materials do not compress easily, you must manually loosen your heat press pressure dial. Squeezing a bulky canvas tote too hard risks crushing the item’s seams or causing the melted ink to bleed outward. Finding that perfect medium pressure is the secret to unlocking the best fabrics for film transfers without ruining your expensive blank products.
Mastering these diverse materials proves that professional-grade equipment is a highly versatile tool for any creative entrepreneur.
Converting Inkjet Printers for DTF: Is the DIY Route Worth the Risk?
Tempted by the price of commercial equipment, beginners often wonder if they can use a regular home printer. The short answer is yes, but converting inkjet for film transfers is essentially performing open-heart surgery on office electronics. You are taking a standard photo printer—designed for watery ink—and altering it to accept heavy fabric inks. This DIY route demands immense technical patience.
Transforming a standard machine involves complex physical alterations. Before taking a screwdriver to a desktop model, consider this DIY checklist:
- Waste Ink Tanks: Bypassing the internal sponge to install an external bottle for heavy ink runoff.
- Dampener Systems: Modifying the tiny internal ink filters (dampeners) so thick white ink doesn’t clog the nozzles.
- Software Hacks: Buying third-party translation software to trick the machine into printing white layers.
These modifications introduce hidden costs that quickly eat away at initial savings. Because converted machines lack built-in circulation systems to keep the ink moving, owners inevitably face frustrating clogs, ruined printheads, and wasted film.
Eventually, this daily maintenance makes upgrading to a purpose-built dtf printer the logical next step. Commercial machines feature a dual print head configuration—one dedicated entirely to colors and another exclusively for white ink—ensuring reliable prints without endless tinkering.
Calculating Your ROI: The Real Cost of Producing a DTF T-Shirt
Understanding your exact material expenses is the first step toward running a profitable apparel business. When you create a standard 10-by-10 inch dtf transfer, you pay for three ingredients: the clear film, the specialized ink, and the adhesive powder. Together, these components usually total around one to two dollars per design. This low expense is the secret to strong profit margins.
Traditional outsourced screen printing simply cannot compete with these numbers on smaller orders. Commercial print shops charge steep setup fees for every color, making small requests too expensive for everyday customers. Because digital methods require no physical stencils, your first print costs the exact same as your fiftieth. You can easily accept custom small-batch orders from local sports teams that large factories routinely reject.
Once you master your cost per garment calculation, setting the right retail price takes only seconds. If your printed film costs two dollars and a blank cotton hoodie costs twelve, your break-even point is fourteen dollars. Selling that custom item for forty dollars leaves twenty-six dollars in pure profit. This massive margin lets you confidently offer bulk discounts for larger events while still valuing your time and labor.
A dedicated dtf printer makes these impressive margins a reality, but the math only works if the final product is flawless.
Troubleshooting Common Print Issues: Why Does My Design Feel Plastic-y?
Peeling the film off a freshly pressed shirt should be a triumph, but excitement quickly fades if the design feels like a heavy plastic shield. Industry professionals call this texture “hand-feel”—the physical sensation of the ink on the fabric. Stiff, overly thick transfers feel noticeably cheap to the wearer and are far more likely to crack in the laundry.
True professional quality begins long before your dtf printer lays down any color. You can fix heavy, dull prints by adjusting saturation in your rip software for color management—the translation program telling the machine exactly how much ink to use. Dialing back the white ink density creates a much softer layer without losing opacity, and managing these flow levels actively teaches you how to prevent print head clogging during daily production.
Invisible environmental factors can also ruin otherwise perfect transfers through static interference. When your workspace air becomes too dry, static electricity builds up on the clear film, causing the adhesive powder to desperately cling to empty, unprinted spaces. Once melted under the heat press, these stray specks form a rough, messy border around your image, meaning basic room humidity control is required to keep the powder strictly on the wet ink.
The final secret to eliminating any remaining plastic sensation is a simple finishing technique called second-pressing. After peeling the clear film away, covering the bare design with parchment paper and pressing it again briefly pushes the ink directly into the fabric’s fibers.
Your DTF Action Plan: 5 Steps to Your First Professional Print
Operating a dtf printer isn’t magic—it’s a manageable, step-by-step recipe. Gaining this foundational knowledge allows you to confidently tackle custom clothing projects without the guesswork.
At its core, you are simply mastering the Print-Powder-Heat method. By laying down vibrant colors, backing them with a solid white foundation, dusting them with adhesive powder, and melting it all together, you create a flawless dtf transfer. This completely bypasses the traditional limitations of custom clothing, giving you the freedom to press your vibrant designs onto everything from basic cotton tote bags to tricky polyester athletic wear, which happen to rank among the best fabrics for film transfers.
Before you start taking orders, remember that your new equipment behaves a bit like a demanding houseplant. It thrives in a stable environment, making humidity and temperature control the absolute most critical factors of your new workspace. Keeping the air around your setup consistently moist prevents the parts that spray the ink from drying out, ensuring your daily maintenance takes minutes instead of hours and saving you from frustrating clogs.
Transitioning from learning about this technology to actually launching a profitable custom brand requires a clear plan of action. To help you transform your spare room into a reliable, professional-grade production hub, you need a straightforward blueprint that prioritizes consistency right out of the gate.
The 5-Step Launch List:
- Setup Environment (Humidity/Temp)
- Test Print/Color Calibrate
- The 50-Wash Durability Test
- Price Your Catalog
- Marketing Your ‘Any Fabric’ Advantage
Understanding direct-to-film technology allows you to completely bypass the costly mistakes most beginners make. Start with a single, simple design to see immediate results, and notice how quickly the printing and pressing process begins to feel like second nature. Each time you successfully peel the film away to reveal a perfect graphic, you build the foundation needed to turn your creative ideas into a thriving, durable apparel brand.