The world of custom apparel has undergone a massive transformation over the past two decades. Gone are the days when launching a clothing brand required massive upfront capital, warehouse space, and the risk of holding thousands of unsold garments. Today, the democratization of fashion is driven by advanced technology, and at the heart of this revolution is the DTG printer. Get the Best information about dtg printer.
Direct-to-Garment (DTG) printing has reshaped how creators, entrepreneurs, and established brands approach custom apparel. By allowing highly detailed, full-color images to be printed directly onto fabric with virtually zero setup time, it has become the backbone of the modern print on demand industry. But while a DTG printer is an incredible piece of machinery, it is not the only way to print a t-shirt.
If you are considering starting a custom t-shirt business or upgrading your current production floor, understanding how DTG compares to other industry-standard methods is crucial. In this comprehensive guide, we will explore the nuances of the digital apparel printing process, compare it directly to other popular methods like screen printing and Direct-to-Film (DTF), and give you the actionable knowledge you need to succeed.
Chapter 1: Textile Inkjet Technology Explained
To understand why a DTG printer is so valuable, you first need to understand how it works. At its core, a DTG printer functions much like the desktop paper printer you might have in your home office, but on a much more sophisticated, industrial scale.
With textile inkjet technology explained simply, it involves specialized printheads moving back and forth across a fabric substrate, precisely depositing microscopic droplets of ink to recreate digital images. However, printing on fabric is vastly different from printing on paper. Fabric is porous, flexible, and subject to being stretched and washed.
To achieve a retail-quality print, DTG relies on water-based pigment inks for fabric. These inks are specially formulated to bind with the fibers of the garment. Unlike traditional plastisol inks that sit heavily on top of the fabric like a sheet of plastic, water-based pigment inks absorb partially into the fibers. This results in a soft “hand-feel” (the tactile texture of the print) and vibrant colors that breathe with the garment.
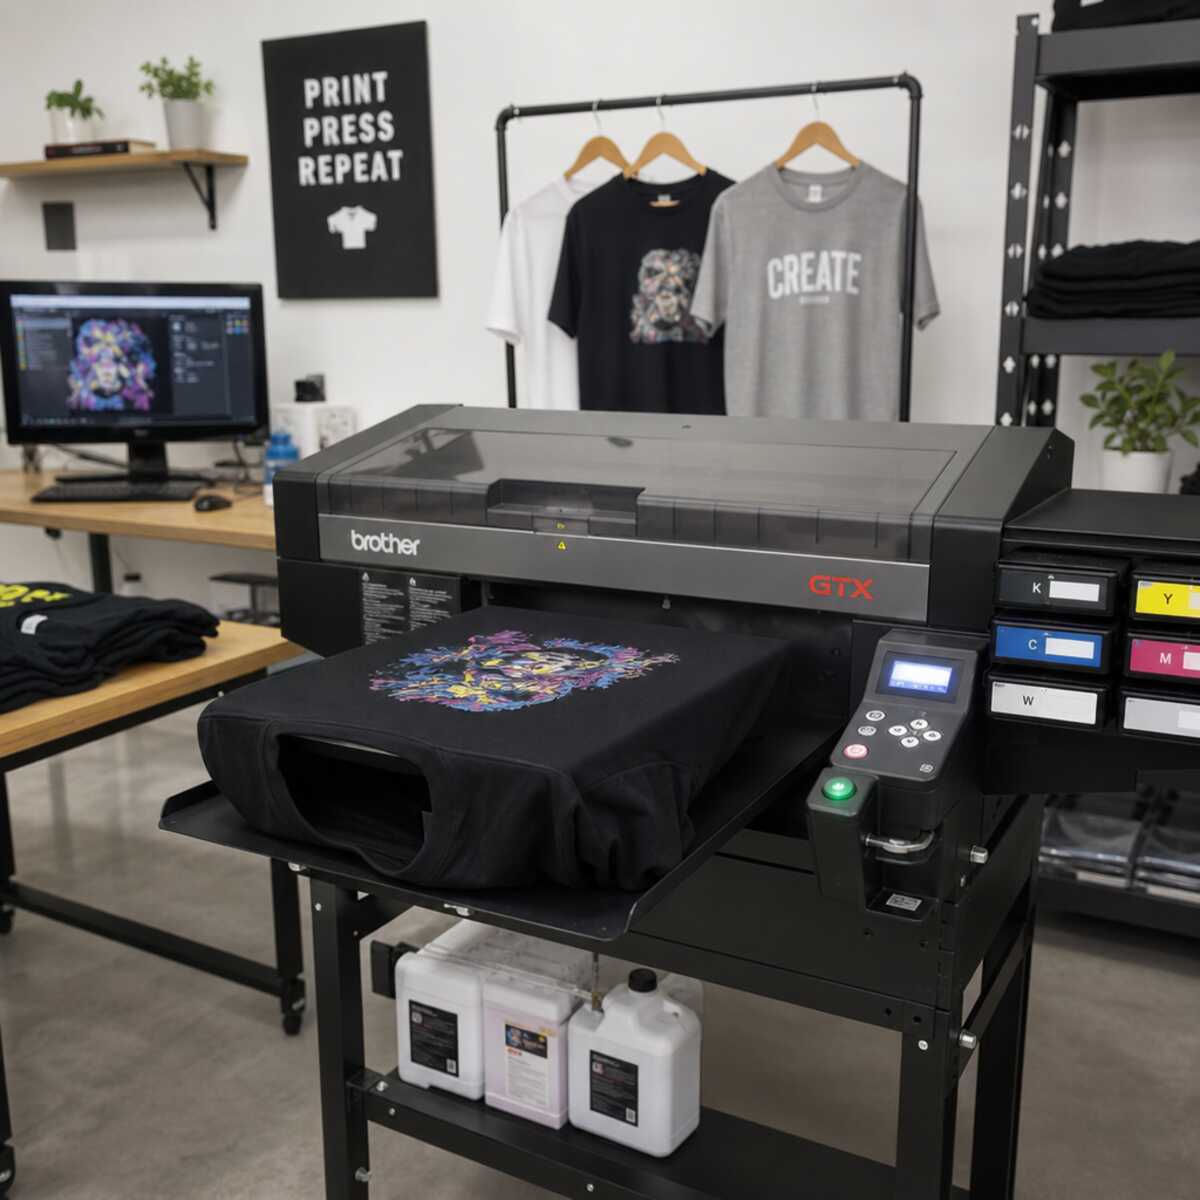
The Anatomy of a DTG Printer
A commercial DTG setup features several critical hardware components:
- The Printheads: These are the engines of the machine, featuring thousands of microscopic nozzles that fire ink at high speeds.
- The Ink Delivery System: A network of tubes, dampers, and pumps that move the water-based pigment inks for fabric from the cartridges to the printheads without introducing air bubbles.
- Industrial Grade Platen Options: The platen is the flat surface where the shirt is loaded. Because custom apparel comes in all shapes and sizes, professional DTG machines offer interchangeable industrial grade platen options. This allows operators to easily switch between printing on adult t-shirts, youth sizes, baby onesies, tote bags, and even zippered hoodies.
- The Carriage and Gantry: The mechanical arms that move the printhead assembly over the garment with millimeter precision.
Chapter 2: The Digital Apparel Printing Process Step-by-Step
Creating a flawless custom t-shirt using a DTG printer is not as simple as clicking “Print.” It is a precise, multi-step digital apparel printing process that requires attention to detail. Let’s break down the exact workflow.

Step 1: Artwork Preparation and RIP Software
Before ink ever touches fabric, the digital artwork must be processed. This is where Raster Image Processor software functionality comes into play. The RIP software is the brain behind the operation.
Standard image files (like PNGs or TIFFs) cannot be read directly by a DTG printer. The RIP software translates the image’s colors into the exact mixture of Cyan, Magenta, Yellow, Black, and White (CMYK+W) inks the printer needs.
Furthermore, robust Raster Image Processor software functionality includes:
- Ink Volume Control: Determining exactly how much ink to lay down based on the garment color.
- White Underbase Generation: Automatically calculating where white ink is needed to make colors pop on dark garments.
- Color Profiling: Ensuring the colors on your monitor match the colors printed on the fabric.
- Cost Estimation: Calculating the exact cost of ink for a specific design, which is vital for your cost per print analysis.
Step 2: Pretreatment Solution Application
If you are printing on a dark garment, this step is non-negotiable. Because water-based inks soak into the fabric, printing vibrant colors on a black shirt would result in a muddy, invisible mess. To prevent this, a liquid primer must be applied.
Pretreatment solution application serves a dual purpose. First, it flattens the microscopic stray fibers (fibrillation) of the shirt to create a smooth canvas. Second, and most importantly, it acts as a chemical catalyst. When the white ink hits the pretreated fabric, the pretreatment solution instantly coagulates (gels) the ink, stopping it from soaking into the fabric. This allows the white ink to sit on top of the garment as an opaque underbase.
Actionable Tip: Apply pretreatment evenly using an automatic pretreatment machine rather than a hand sprayer. Inconsistent pretreatment solution application will lead to splotchy prints and poor wash fastness.
Step 3: CMYK and White Ink Layering
Once the garment is pretreated and loaded onto the platen, the DTG printer goes to work. For dark garments, the machine utilizes CMYK and white ink layering.
- The Underbase: The printer lays down a solid layer of white ink precisely in the shape of the design.
- The Color Pass: Immediately after, the printer deposits the CMYK colors directly on top of the wet white underbase.
This CMYK and white ink layering is a marvel of modern engineering, allowing for millions of color combinations, smooth gradients, and photorealistic details that other printing methods simply cannot replicate.
Step 4: Curing Prints with a Heat Press
The final step is to permanently set the ink into the fabric. Curing prints with a heat press or a forced-air conveyor dryer evaporates the water from the ink, leaving the pigments permanently bound to the garment fibers.
If curing prints with a heat press, the standard practice involves hovering the heat press over the wet print for a few seconds to let steam escape, and then pressing the shirt firmly with a sheet of parchment paper or Teflon over the design at around 320°F to 330°F (160°C – 165°C) for 60 to 90 seconds. Proper curing is the single most important factor in ensuring the wash fastness of digital apparel prints.
Chapter 3: The Heavyweight Match: Direct to Garment vs Screen Printing
When exploring the custom apparel industry, the most common debate is direct to garment vs screen printing. Screen printing is the traditional, time-tested method of apparel decoration. It involves creating a stencil (a screen) for each color in a design and pushing thick plastisol ink through the screen onto the shirt using a squeegee.
Both methods have their distinct advantages, and understanding the direct to garment vs screen printing dynamic is vital for anyone starting a custom t-shirt business. Let’s compare them across several critical metrics.
1. Setup Time and Minimum Order Quantities (MOQs)
- Screen Printing: Highly labor-intensive setup. You must separate the artwork by color, print film positives, coat screens with emulsion, expose them to UV light, wash them out, dry them, and align them perfectly on the press. Because of this lengthy setup, screen printers usually require a minimum order of 24 to 50 shirts.
- DTG Printer: Virtually zero setup time. You process the art in your RIP software, pretreat the shirt, and print. This makes DTG the undisputed king of one-offs and the driving force behind the print on demand business model.
2. Color Capabilities and Artwork Complexity
- Screen Printing: Every color requires a separate screen. A 6-color design requires 6 screens, significantly increasing the cost and labor. Furthermore, while screen printing can achieve gradients using “halftones” (tiny dots), photorealistic images are highly complex to achieve.
- DTG Printer: Because a DTG printer uses CMYK blending, it can print millions of colors simultaneously. Photographs, complex watercolor designs, and intricate gradients are executed flawlessly without any additional cost per color.
3. Hand-Feel and Breathability
- Screen Printing: Traditional plastisol inks sit on top of the fabric. A large, solid design can feel like a heavy, unbreathable shield on the chest (often called a “sweat patch”).
- DTG Printer: Because it uses water-based pigment inks for fabric, the print feels incredibly soft and breathable. After a single wash, the print is almost indistinguishable from the fabric itself to the touch.
4. Cost Per Print Analysis and Order Volume
In the debate of direct to garment vs screen printing, the volume of the order dictates the most cost-effective method.
Let’s look at a basic cost per print analysis: With DTG, the cost of ink and pretreatment is relatively static per shirt. Whether you print 1 shirt or 100 shirts, a large, full-color design might cost $2.50 in ink and pretreatment per shirt.
- Cost to print 1 shirt: $2.50
- Cost to print 100 shirts: $250.00
With screen printing, the upfront cost (screens, films, labor) is high, but the actual ink cost per shirt is pennies. Let’s assume a setup cost of $50 for a 3-color design, plus $0.20 of ink per shirt.
- Cost to print 1 shirt: $50.20
- Cost to print 100 shirts: $70.00 ($0.70 per shirt)
The Takeaway: Use a DTG printer for low-volume orders, highly complex full-color designs, and print on demand fulfillment. Use screen printing for bulk orders of 50+ shirts with limited color palettes (like local sports team jerseys or massive corporate event giveaways).
Chapter 4: The New Contender: Direct to Film vs DTG
In recent years, a massive technological disruption has entered the space: Direct-to-Film (DTF) printing. If you are researching digital apparel printing, you must understand the nuances of direct to film vs dtg.
While both methods utilize digital inkjet technology and CMYK+W inks, the application process and end results are distinctly different.
How Direct-to-Film (DTF) Works
Instead of printing directly onto a pretreated shirt, a DTF printer prints the design in reverse onto a specialized PET film. While the ink is still wet on the film, it is passed through a powder shaker where a hot-melt adhesive polyurethane powder is applied to the wet ink. The film is then baked to melt the adhesive. This resulting “transfer” can then be heat-pressed onto almost any garment.
Comparing Direct to Film vs DTG
1. Fabric Versatility
- DTG Printer: DTG is notoriously picky about fabrics. Because water-based inks need fibers to bind to, the best fabrics for digital textile printing via DTG are 100% natural fibers (cotton, bamboo, hemp). Printing DTG on 100% polyester is incredibly difficult, requires specialized (and expensive) polyester pretreatment, and often yields inconsistent results.
- DTF Printing: DTF can be applied to virtually anything that can withstand the heat of a heat press. Cotton, polyester, nylon, spandex, leather, and even wood. In the direct to film vs dtg matchup, DTF wins easily on material versatility.
2. The Pretreatment Factor
- DTG: Requires the liquid pretreatment solution application for dark garments, which can sometimes leave a faint “box” or stain on certain garment dyes that needs to be washed out.
- DTF: Requires absolutely zero liquid pretreatment. The powder adhesive handles the bonding.
3. Hand-Feel and Quality
- DTG: Produces a luxurious, soft, breathable print that integrates with the fabric.
- DTF: Because you are melting a layer of adhesive and ink onto the top of the fabric, DTF has a noticeable plastic-like feel (similar to a very thin vinyl). It does not breathe. For large, solid designs, it can feel slightly stiff compared to DTG.
4. Wash Fastness of Digital Apparel Prints
- DTG: Excellent wash fastness if cured properly, though the print will naturally fade very slightly over dozens of washes, taking on a vintage, soft look.
- DTF: Incredible durability. The polyurethane adhesive is incredibly strong. However, if washed in heavy heat, it is prone to cracking or peeling rather than fading over time.
The Takeaway: If your brand focuses on high-end, retail-quality 100% cotton t-shirts with a soft hand-feel, a DTG printer is superior. If you need to print on backpacks, polyester activewear, and windbreakers without worrying about pretreatment, DTF is a highly valuable alternative. Many modern print shops actually employ both methods.
Chapter 5: Comparing DTG to Sublimation and Heat Transfers
While direct to garment vs screen printing and direct to film vs dtg are the major industry comparisons, it is worth briefly mentioning two other methods you will encounter when starting a custom t-shirt business.
Dye Sublimation
Dye sublimation involves printing a design onto specialized paper with sublimation inks, and then heat-pressing it onto a garment. The heat turns the ink into a gas, which permanently dyes the fabric fibers.
- Pros: Zero hand-feel (the ink becomes part of the fabric). Permanent wash fastness.
- Cons: It only works on light-colored, 100% polyester fabrics. You cannot sublimate a black shirt, nor can you sublimate cotton.
Traditional Heat Transfer Vinyl (HTV)
This involves using a computer-guided blade to cut a design out of colored vinyl rolls, picking out the excess vinyl (weeding), and heat pressing it onto the shirt.
- Pros: Very cheap to start. Great for simple, 1-color designs like names and numbers on sports jerseys.
- Cons: Highly labor-intensive for complex designs. Impossible to do photorealistic images or gradients. Heavy, thick hand-feel.
Chapter 6: Fabric Matters: Choosing the Best Canvas
Your DTG printer is only as good as the blank canvas you feed into it. The interplay between water-based pigment inks for fabric and the garment’s molecular structure dictates the final vibrancy and durability of the print.
So, what are the best fabrics for digital textile printing?
1. 100% Ring-Spun Cotton (The Gold Standard)
Standard “carded open-end” cotton (the cheap, scratchy t-shirts often given away at promotional events) has a very fuzzy, uneven surface. Printing on it is like painting on a gravel road. Ring-spun cotton, on the other hand, is tightly woven, incredibly smooth, and creates a flat printing surface. For a DTG printer, tightly woven 100% ring-spun or combed cotton is the absolute best fabric. It yields the sharpest images, requires less pretreatment, and offers the highest wash fastness of digital apparel prints.
2. Tri-Blends (Cotton / Polyester / Rayon)
Tri-blends are incredibly popular in modern fashion because of their extreme softness and flattering drape. However, they are tricky for a DTG printer. Because they contain synthetic fibers (poly and rayon) that resist water-based inks, DTG prints on tri-blends tend to look faded, muted, and “vintage.” Actionable Tip: If your customer wants a bright, neon-vibrant print, do not sell them a tri-blend. If they want a distressed, retro, soft-faded look, tri-blends printed via DTG are perfect.
3. 100% Polyester
As mentioned in the DTF comparison, printing water-based ink on 100% polyester (like athletic moisture-wicking shirts) is the Achilles heel of the DTG printer. The ink will bleed (dye migration) and wash out. Unless you are using advanced, specialized DTG systems built specifically for poly, it is best to avoid it or use DTF/sublimation instead.
Chapter 7: The Economics of Starting a Custom T-Shirt Business
With a clear understanding of the digital apparel printing process, let’s talk business. Starting a custom t-shirt business using a DTG printer offers incredible opportunities, largely due to the print on demand (POD) business model.
The Power of Print on Demand
Historically, starting a clothing line meant guessing what sizes and designs would sell, ordering 1,000 shirts from a screen printer, and praying you didn’t end up with boxes of unsold XXL shirts in your garage.
A DTG printer eliminates inventory risk. In a print on demand model, you create a digital mockup of your design and place it on your e-commerce store.
- The customer pays you $30 for a shirt.
- Only after you have been paid do you load a blank shirt onto your machine and print it.
- You ship the shirt directly to the customer.
You never print a shirt that hasn’t already been sold.
Executing a Cost Per Print Analysis
To ensure your business is profitable, you must master the cost per print analysis. Let’s break down the actual costs of producing a premium dark t-shirt with a full-color graphic using a commercial DTG printer:
- Premium Blank T-Shirt (100% Ring-Spun Cotton): $3.50
- Pretreatment Solution: $0.35 (Depending on the spray area)
- CMYK and White Ink Layering (Large Graphic): $1.80 (White ink makes up about 70% of this cost)
- Labor & Overhead (Electricity, heat press, maintenance): $1.00
- Packaging and Poly-mailer: $0.35
- Total Cost of Goods Sold (COGS): $7.00
If you sell that custom apparel piece for $28.00, your gross profit is $21.00 per shirt. If your DTG printer can produce 30 dark shirts an hour, your machine is capable of generating over $600 an hour in gross profit.
However, to realize these profits, your machine must stay running, which brings us to the most critical aspect of DTG ownership.
Chapter 8: Mastering Maintenance and Software
The most common reason people fail when starting a custom t-shirt business with a DTG printer is that they treat it like a household paper printer. They let it sit for weeks without use and then wonder why it’s broken.
Water-based pigment inks for fabric—especially the white ink—are heavy. White ink gets its opacity from titanium dioxide (the same mineral used in sunscreen). If left sitting, the titanium dioxide will settle at the bottom of the ink lines and solidify inside the microscopic nozzles of the printhead, permanently destroying it.
How to Maintain Garment Printheads
Understanding how to maintain garment printheads is the difference between a highly profitable business and thousands of dollars in repair bills.
Here is a standard best-practice maintenance routine:Daily Maintenance
- Agitate the White Ink: Every morning, you must gently shake the white ink cartridges or pouches. Most high-end DTG machines have built-in WIMS (White Ink Management Systems) that automatically circulate the ink, but physical agitation is still highly recommended.
- Perform a Nozzle Check: Print a tiny diagnostic grid on a scrap piece of fabric or transparent film. Your Raster Image Processor software functionality will have a built-in tool for this. This check shows you if all nozzles are firing correctly.
- Auto-Cleaning: If nozzles are missing, run a light head cleaning via the software.
- End of Day Wet Capping: When shutting down, you must ensure the printhead docks securely onto a “capping station” filled with a specialized cleaning solution. This keeps the printhead wet overnight, preventing the ink from drying out.
Weekly/Monthly Maintenance
- Swab the Wiper Blade and Printhead Rim: Using specialized foam swabs and cleaning fluid, gently clean lint and dried ink from the edges of the printhead and the rubber wiper blade that sweeps the printhead clean.
- Clean the Encoder Strip: The encoder strip is a clear plastic band with microscopic lines that tells the printhead exactly where it is over the platen. If it gets dirty with ink mist, prints will come out blurry or misaligned.
Environment Control: The Secret to Uptime
A DTG printer is highly sensitive to its environment. They require humidity to keep the water-based inks from drying in the air. You must keep your printing room between 45% and 60% relative humidity, and the temperature around 68°F to 78°F (20°C – 25°C). Buying a high-quality room humidifier and a hygrometer is a mandatory investment.
Chapter 9: Maximizing the Wash Fastness of Digital Apparel Prints
You have dialed in your software, selected the best fabrics for digital textile printing, and mastered how to maintain garment printheads. You print a beautiful shirt and ship it to your customer. Two weeks later, they email you a photo of a cracked, faded, peeling mess. What went wrong?
The wash fastness of digital apparel prints relies entirely on executing the digital apparel printing process perfectly, specifically the pretreatment and the curing phases.
Troubleshooting Poor Wash Fastness
If your prints are washing out, check these three culprits:
- Too Little or Too Much Pretreatment:
- Too little: The white ink will soak into the fabric instead of gelling on top, causing the print to look faded immediately, and wash out quickly.
- Too much: The ink binds to the thick layer of pretreatment instead of the shirt fibers. In the wash, the heavy pretreatment flakes off, taking the ink with it.
- Improper Curing with a Heat Press:
- Water-based pigment inks for fabric must reach a specific temperature (usually 320°F/160°C) all the way through the ink layer for a sustained amount of time (typically 60-90 seconds) to allow the binding agents to cross-link with the cotton fibers.
- If your heat press is set to 320°F, but the actual platen is only putting out 290°F (due to cheap manufacturing or cold spots), the ink will not cure. Actionable tip: Always test your heat press with a laser surface thermometer or heat-testing strips.
- If you use too much pressure on the heat press, you can drive the wet ink too far into the garment or cause it to spread, ruining image clarity. Use medium pressure.
- Customer Washing Habits:
- You must educate your customers! Include a care card with every print on demand order.
- Instruct them to wash the custom apparel inside out, on cold, using a mild detergent, and to tumble dry on low or hang dry. High heat in a home dryer is the mortal enemy of all custom apparel.
Chapter 10: Scaling Your Operations: Hardware and Workflow Optimization
As your custom t-shirt business grows, a single DTG printer may no longer handle your volume. Scaling up requires looking at industrial solutions and optimizing your workflow to maximize output.
Upgrading Your Hardware
When moving from entry-level to industrial DTG, you will notice significant upgrades in:
- Dual Printheads: Industrial machines often have dedicated printheads for white ink and separate heads for CMYK. This allows for “one-pass” printing, where the machine lays down the white underbase and the CMYK colors simultaneously, drastically speeding up production.
- Advanced Industrial Grade Platen Options: High-volume shops utilize dual-platen or carousel systems, allowing an operator to load a blank shirt on one platen while the machine is actively printing on the other. Vacuum platens are also available, which suck the garment down perfectly flat without the need for manual smoothing or platen hoops.
Workflow Optimization
Efficiency is profit. To maximize your cost per print analysis, your operator should never be waiting for a machine, and a machine should never be waiting for an operator.
- The Golden Triangle: Set up your workspace so your pretreatment machine, DTG printer, and heat press form a tight triangle. The operator should be able to pivot from taking a shirt off the printer, slapping it onto the heat press for curing prints with a heat press, and loading a freshly pretreated shirt onto the printer in a matter of seconds.
- Barcode Automation: Advanced Raster Image Processor software functionality allows for barcode integration. An operator scans a barcode on a work order, and the RIP software instantly loads the correct artwork, auto-generates the white mask, and sets the specific ink volume profiles for that exact garment color and type.
Conclusion: Is a DTG Printer Right for You?
The landscape of custom apparel is vast, but the integration of a DTG printer into the market has undeniably changed the rules of the game.
Let’s review the core takeaways:
- If you are starting a custom t-shirt business utilizing a print on demand model, focused on high-quality, full-color designs without minimum order limits, DTG is the absolute best technology available today.
- When weighing direct to garment vs screen printing, remember that screen printing wins on bulk, limited-color orders, while DTG wins on infinite colors and one-offs.
- In the battle of direct to film vs dtg, DTG provides the ultimate soft hand-feel on cotton, whereas DTF offers unparalleled versatility across synthetic fabrics and difficult substrates.
- The digital apparel printing process is an exact science. Mastery over pretreatment solution application, CMYK and white ink layering, and curing prints with a heat press will dictate the ultimate wash fastness of digital apparel prints.
- Your profitability hinges on a precise cost per print analysis and strict adherence to how to maintain garment printheads. Treat your machine with respect, manage your humidity, and it will serve as a reliable cash-flow engine.
With textile inkjet technology explained and compared comprehensively, you are now equipped with the knowledge to make an informed decision. Whether you are printing intricate artwork on the best fabrics for digital textile printing using water-based pigment inks for fabric, or utilizing complex Raster Image Processor software functionality to automate your warehouse, the DTG printer remains an incredibly powerful tool in the arsenal of modern apparel decoration.
Embrace the technology, respect the maintenance schedule, and let your creativity run wild. The blank canvas of a custom t-shirt is waiting for your design.