Sealing the driveway is an investment in curb appeal and dollars. Doing so helps extend its life expectancy and forestall costly replacement costs. Obtain the Best information about driveway waterproofing.
Before sealing, clean and patch any cracks in the concrete surface. Wear rubber gloves and eye protection when handling sealers, as they can stain surfaces. Hose down the surface before mopping to eliminate oil, grease, and other forms of staining.
Preparation
Before sealing your driveway, it must be in pristine condition. Trim any overgrown grass at the edges and treat oil stains to help get things underway. Use a wire broom or blower to clean its surface thoroughly; power washing might provide additional deep-cleaning options.
At this stage, it would also be wise to use this time to seal up any cracks with quality crack sealer – this will extend the lifespan of your driveway while protecting its new sealant from splitting or washing away during rain/thaw cycles.
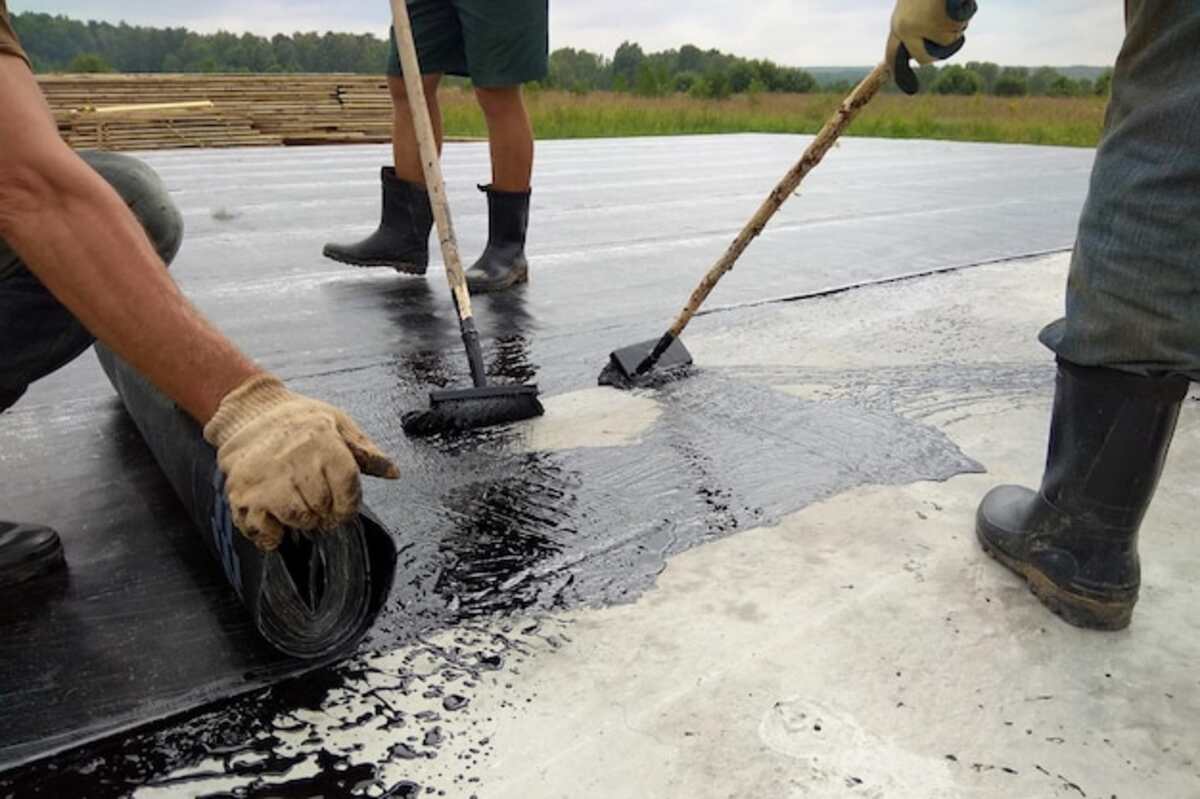
Depending on the brand of sealant you select, the application may come as a spray or brush application. While spray application offers quickness and cost-effectiveness, brush application offers a deeper coating that penetrates crevices more thoroughly, not to mention that brush applications last longer.
When applying your new sealant, ensure it is done during the week with warm temperatures and no rain. Otherwise, the bond may become wet and cause an uneven finish that blotches out or pools up on itself.
Once your first coat of coating has dried for 48 hours, allow vehicles to return. You may restrict access using boards and flagging tape or ask friends and neighbors to park elsewhere for now.
Sealing
Asphalt driveways should be sealed regularly to maintain watertight surfaces and protect the driveway surface from seepage, which could weaken and crack it, eventually forming potholes and cracks, particularly in cold climates where freeze-thaw damage is more likely. Sealers also help shield your driveway against ultraviolet rays that fade its color over time.
Before applying a sealant, your work area must be prepared by placing a piece of plywood on a flat work surface. Protective clothing and a mask should also be worn to avoid skin contact and inhaling toxic vapors from sealant cans. Be sure to read and follow all instructions provided on sealer cans; some asphalt sealers require 24-hour dry times during which vehicular traffic should not pass; it’s tempting to drive on newly sealed driveways as soon as they feel dry, but this could result in costly repairs or even complete replacement!
Driveway concrete sealers are designed to penetrate the surface of a concrete driveway, filling any small cracks and protecting against weather, foot traffic, and vehicular traffic damage. Some driveway sealers also come equipped with fast-dry technology that makes them usable within an hour for feet and vehicles alike, though such products may not last as long.
Drying
Before sealing your driveway, the concrete must be arid. This can be accomplished using either a power washer or simply sweeping. Ideally, waiting until a sunny day with no chance of rain would expedite this process even more quickly.
When applying a driveway sealer, always follow the manufacturer’s directions. Most sealers require one or two coats depending on your driveway size and manufacturer recommendations; to ensure an even surface and prevent laps in color, purchase extra sealer than you think you’ll need; this extra can be used for touch-ups later.
If your interlocking driveway appears patchy after applying a sealer, this could be a telltale sign of areas being washed away by rainwater. When weather permits, reseal those areas to keep them looking brand new. For safety purposes, however, new sealants need 24 hours to cure; use barrels, sawhorses, or brightly-colored ribbons as roadblocks to block your driveway from traffic and allow the glue to harden correctly.
Cleaning
Concrete is porous by design, and its pores become clogged with dirt, pollutants, oil, grease, and other contaminants that threaten its integrity. Regular cleaning helps eliminate surface stains while protecting its integrity, whereas power washing concrete offers even deeper cleansing by clearing away impurities that have settled deep within its pores.
Concrete-safe products such as Wet & Forget are effective against mold, mildew, algae, and lichen growth on concrete driveways. Mix one part Wet & Forget with five parts water in a pump garden sprayer to saturate affected areas before leaving to dry for 24 hours before repeating if necessary – you will notice that all signs of fungal growth have died off, while any spores have dispersed, leaving behind a fresh appearance to your driveway!
If your exposed aggregate has rust-colored stains, you may be able to get them to fade by soaking it with vinegar or commercial rust cleaners suitable for concrete. However, if the color is heavy enough, you may need to repeat this step twice or thrice until it eventually vanishes.
Paint splatters are all too familiar on both asphalt and concrete surfaces. Still, latex-based spills may be cleaned away by applying an absorbent product like clay-based kitty litter or household scouring powder to saturate the area and absorb any remaining latex residue. If the stain persists, use a stiff nylon brush or household cleanser with hot water to scrub away and rinse away – otherwise, leave to dry before continuing!
Read Also: Make Home Depot Your Go-To For All Your Truck Rental Needs